The most likely – yet least opportune time – for tools to fail is in the middle of a project. My old Ryobi 12v cordless drill charger bit the dust in the middle of installing my monitor mount, but I was able to fix it without spending a dime.
 |
| The drill is less useful without charged batteries |
When I popped the battery in to charge it, the light on the charger didn’t come on. It didn’t work for the other battery, or on another outlet. So, I busted out the multimeter and measured the batteries and the charger voltages. One battery was respectably close around 9.5v, but the other was completely dead at 0.00v. The charger itself was putting out 3v, which wouldn’t do much to charge a 12v battery.
I found a replacement charger on Amazon, but the reviews were overwhelmingly negative. The weak power supply was prone to dying when charging a weak battery, so my 0v battery would probably blow it immediately. Having only a single battery wasn’t desirable – they 12v batteries don’t last long anyway, and many of my projects have been temporarily halted while I charge the batteries. Maybe it’s time to buy an 18v cordless drill.
Of course, with nothing to lose, some other options are opened up. I keep the DC converters from old electronics that bite the dust, and I found one that was similarly rated at 15v. However, it was rated for 800mA whereas the original was 200mA. I want the extra juice to be able to charge batteries even if they’re very low, but I don’t want to overcharge them. I then measured the charger and found it to be almost 20v! This might have a higher risk of destroying the batteries than I had hoped, but it’s the closest converter that I had available.
 |
| The charger and power supply, along with the donor power supply |
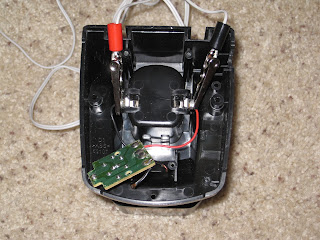
After researching batteries a bit and deciding that there the risk was acceptable, I donned safety glasses and moved to a safe area in case there was a problem. I opened up the charger case and found where the charger was connected to the circuit board. I cut those wires and clipped the donor power supply directly to the charging connectors (alligator clips are color coded incorrectly, but the connection is correct).
 |
| Testing the direct connection |
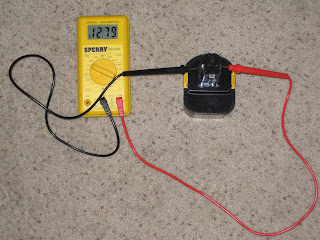
Next, I tested with the “dead” battery to see if it could take a charge. I tested for about 5 seconds to make sure I was doing it right.
 |
| Quick Test |
It showed a few hundredths of a volt! I began charging for longer periods and checking the voltage every few minutes. Eventually I got up past 12v. Actually, I could probably go way past 12v with this new more powerful charger, so I need to be very careful to not burn up the batteries.
 |
| Success! Over 12v |
I charged the other battery and decided that the charger is good to go. I soldered the new wires to the circuit board, and even retooled the pull-stop to prevent the cord from being pulled out and ripping out of the circuit board.
 |
| New wires soldered to the circuit board |
 |
| Reassembled with the pull protector in place |
 |
| Reassembled – bottom view |
 |
| Reassembled – top view |
Now, observe the completed product – the charging light comes on again!
 |
| Charging! |
The bad news is that I have to measure the batteries with a voltmeter if I charge for more than 5 minutes. The good news is that recharges happen much more quickly, and I didn’t have to spend a dime to fix my old drill.
BTW a shorter version of this is available as an Instructable here.
